通常のgitによるソースコード管理そのものですので難しいことは何もありませんが、Rails+Bitbucket環境の例として書き留めておきます。
■前提条件
・新規にRailsアプリケーションを作成
・当該アプリでは一度もGit管理していない
・Bitbucketアカウントは取得済み
・SSH公開鍵は新規作成
■手順
(1) Bitbucketにリポジトリを作成

Dashboardのメニュー[作成]を押下し、[新規リポジトリの作成]画面にて必要事項を入力し、[リポジトリの作成]ボタンを押下します。なお、リポジトリタイプはGit(デフォルト)、プログラミング言語はRubyを選択します。その他項目は必要に応じて入力、選択してください。
(2) gitの初期化
当該Railsアプリのディレクトリに遷移し、gitの初期化を行います。
[bash gutter=”0″]
$ cd **********
$ git init
Initialized empty Git repository in /********/********/**********/.git/
[/bash]
(3) .gitignoreの編集
git管理対象から外したいファイルを指定するために.gitignoreを編集します。デフォルトで生成されているはずですが、もし存在しない場合は新規作成になります。
[bash gutter=”0″]
$ vi .gitignore
[/bash]
今回は以下を追記しますが、必要に応じて追加編集削除してください。
[bash gutter=”0″]
*.swp
*~
.DS_Store
[/bash]
[bash]
# See https://help.github.com/articles/ignoring-files for more about ignoring files.
#
# If you find yourself ignoring temporary files generated by your text editor
# or operating system, you probably want to add a global ignore instead:
# git config –global core.excludesfile ‘~/.gitignore_global’
# Ignore bundler config.
/.bundle
# Ignore the default SQLite database.
/db/*.sqlite3
/db/*.sqlite3-journal
# Ignore all logfiles and tempfiles.
/log/*.log
/tmp
*.swp
*~
.DS_Store
[/bash]
よくわからなければ、githubが公開しているRails用.gitignoreを流用してもOKです。
https://github.com/github/gitignore/blob/master/Rails.gitignore
(4) ファイルの追加とローカルでのコミット
[bash gutter=”0″]
$ git add .
$ git commit -m "initial commit"
[master (root-commit) b2060f1] Initial commit
Committer: ****** <******@*****************.******>
Your name and email address were configured automatically based
on your username and hostname. Please check that they are accurate.
You can suppress this message by setting them explicitly:
git config –global user.name "Your Name"
git config –global user.email you@example.com
If the identity used for this commit is wrong, you can fix it with:
git commit –amend –author=’Your Name <you@example.com>’
5314 files changed, 640951 insertions(+), 0 deletions(-)
create mode 100644 .gitignore
・・・・
・・・・
[/bash]
(5) SSHキーを生成
[bash gutter=”0″]
$ ssh-keygen -t rsa
Generating public/private rsa key pair.
Enter file in which to save the key (/*******/***********/.ssh/id_rsa):
Enter passphrase (empty for no passphrase):
Enter same passphrase again:
Your identification has been saved in /*******/***********/.ssh/id_rsa.
Your public key has been saved in /*******/***********/.ssh/id_rsa.pub.
The key fingerprint is:
******************************************* *********@***************************.******
The key’s randomart image is:
+–[ RSA 2048]—-+
| ******** |
| ******.|
| *******|
| . **** |
| **** ***** . |
| . *******. |
| *******. |
| . . |
| . |
+—————–+
[/bash]
なお、
[bash gutter=”0″]
Enter file in which to save the key (/*******/***********/.ssh/id_rsa):
[/bash]
は、空Enterで
[bash gutter=”0″]
Enter passphrase (empty for no passphrase):
Enter same passphrase again:
[/bash]
では、パスフレーズを入力してください。
生成されたキーは ~/.ssh/ 配下に格納されますので、秘密鍵(id_rsa)のパーミッションを変更しておきます。
[bash gutter=”0″]
$ chmod 600 id_rsa
[/bash]
(6) SSH公開鍵をBitbucketに登録
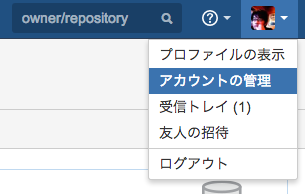
Bitbucketにて[アカウントの管理]を選択し管理画面に遷移したら、左下の[SECURITY]欄のSSH キーを選択します。

[鍵を追加]ボタンを押下します。
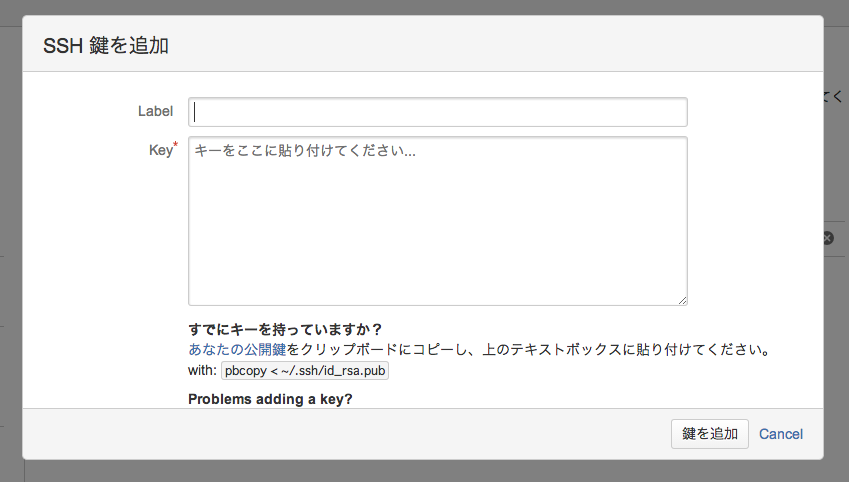
[SSH 鍵を追加]のポップアップが表示されますので、Key欄に公開鍵の中身を貼り付けて、[鍵を追加]ボタンを押下します。
[bash gutter=”0″]
$ cat ~/.ssh/id_rsa.pub
ssh-rsa **********************************
*******************************
***********************************
**********************== ********@************.******
[/bash]
ssh-rsaではじまる上記内容をすべてコピペです。
なお、Label欄が任意入力になっていますが、名前をつけておかないとわからなくなりますので入力をおすすめします。
(7) 上記(1)で作成したリモートリポジトリを指定してBitbucketへファイルをPushする
[bash gutter=”0″]
$ git remote add origin git@bitbucket.org:*****/****************.git
$ git push origin master
The authenticity of host ‘bitbucket.org (131.103.20.168)’ can’t be established.
RSA key fingerprint is *****************************************.
Are you sure you want to continue connecting (yes/no)? yes
Warning: Permanently added ‘bitbucket.org,131.103.20.168’ (RSA) to the list of known hosts.
Enter passphrase for key ‘*******************/.ssh/id_rsa’:
Counting objects: 6171, done.
Compressing objects: 100% (5671/5671), done.
Writing objects: 100% (6171/6171), 35.73 MiB | 2.94 MiB/s, done.
Total 6171 (delta 740), reused 0 (delta 0)
To git@bitbucket.org:*****/****************.git
* [new branch] master -> master
[/bash]
なお、
[bash gutter=”0″]
Are you sure you want to continue connecting (yes/no)?
[/bash]
は、yesで応答します。
これでOKです。